How to set static IP in Tenda N1500 wireless router
Static IP vs Dynamic IP
In last post we’ve demonstrated setting or resetting admin and WiFi password of Tenda N1500 router. Here we’ll show how to assign a static IP address in a Tenda N1500 Wireless route. Nowadays, most ISP or internet connection provider automatically configure IP address using DHCP (Dynamic Host Configuration Protocol) server. Each time your router or laptop connect with internet and get some random IP automatically. So, sometime setting a static IP is unnecessary. But what if your ISP’s (Internet Service Provider) DHCP server fails or you want to adhere with a fixed IP rather a changing IP every time? Setting static IP manually is the only way out then.
Necessary Information
1. Collect range if valid IP, Default Gateway IP, Subnet Mask & DNS server’s IP from your ISP. (This post is written in a perspective of IIT Bombay internal network. Consult IIT Bombay CC website for the above mentioned details. Currently those details are available at http://nms.iitb.ac.in/hostel-ip-allocation-scheme.php)
Caution: Configuring incorrect IP address details may results broken internet connection. So, be careful while acquiring IP address details.
Here we assume 192.168.0.1 is your router’s IP address, which is the Tenda N1500 router’s default IP. Please use proper IP if you’ve modified it.
2. You must have admin password & IP address of your Wireless router on hand to login into router’s administrative interface. If you don’t know the admin password of your router please read this first to reset it and login to the router’s administrative interface.
Procedure
Step 1: Login into Wireless Router
Power on and connect your router with a computer using LAN port. Browse http://192.168.0.1 to login to administrative interface. 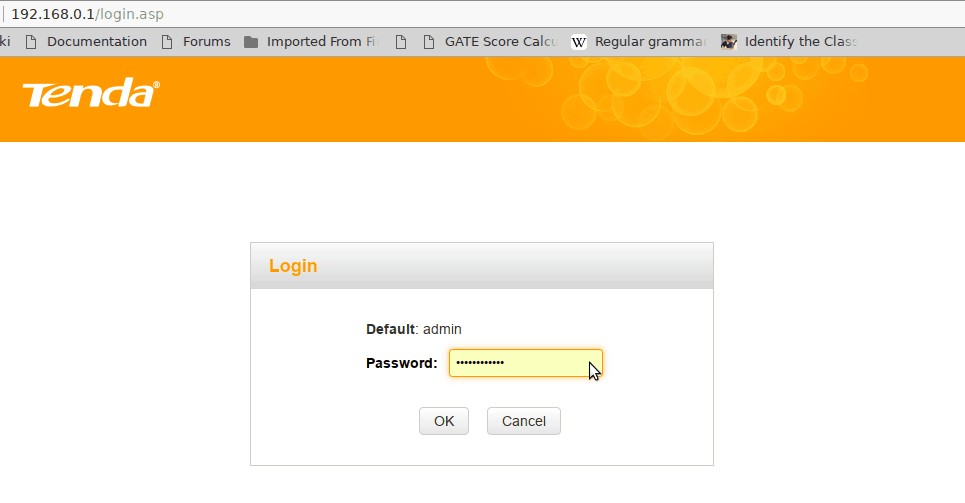 Select “Advance” from next screen.
Step 2: Setting Static IP
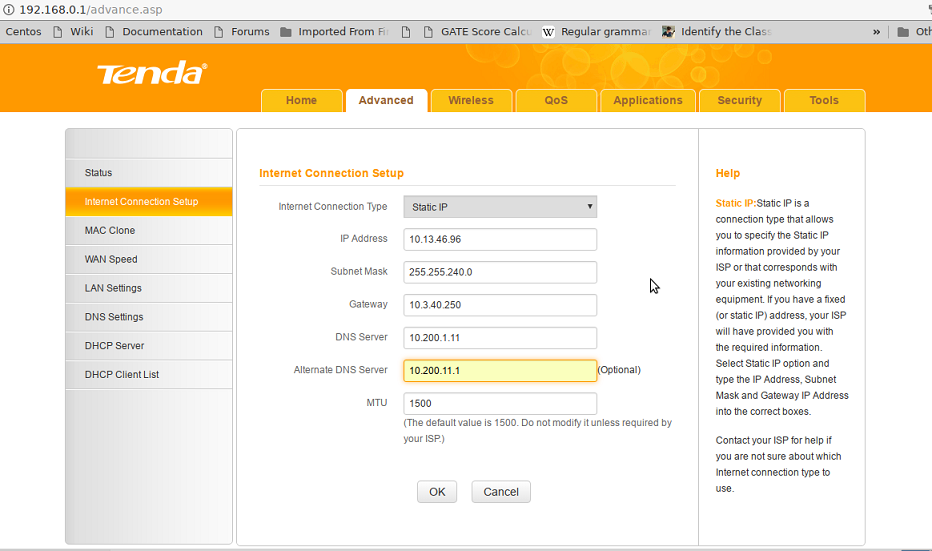
After step 1 you’re supposed be in the following screen. 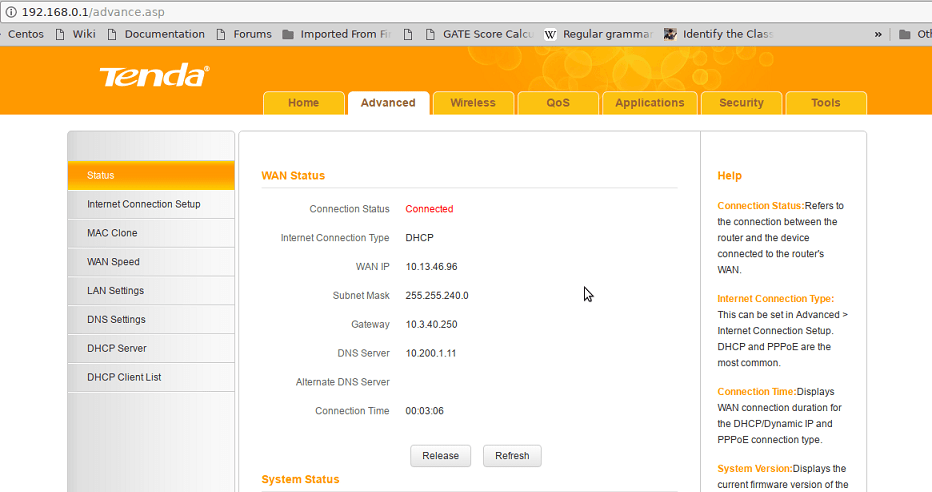
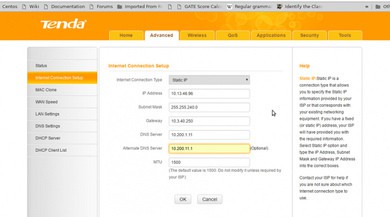
Select “Internet Connection Setup” from the left panel. From the following screen change “Internet Connection Type” to “Static IP”. Fill the details as you obtained from your ISP or organisation and click “OK”.
Note: If your organisation supply with a range of possible IP address like 10.13.32.1-10.13.47.254 you may chose any IP from the range, provided your selected IP is not already taken by someone else. It’s impossible to guess your selected IP is already taken or not. So, if your assigned IP is not working try with another IP from the given IP range.
Step 3: Check Everything is working
Again select “Status” from left panel and check it’s connected or not. A connected status is perfect as shown in the figure of step 2. Now try to browse internet and check it’s working or not. If internet is still not working or you’re getting very slow connectivity please change your IP address again following Step 2.
If you’re still facing issue while setting your router’s IP address please leave your comment here, we’ll try to help you. You may also ask question using “Ask Question” button. If you want to publish your own post to ServerLog.net please contact us at the email ID mentioned in contact section. Thanks for reading us.
Views: 1060