Change Proxy Settings in Firefox
Deficulty: Easy, Time Require: 5 min
Unlike Google Chrome, Firefox has it’s own proxy configuration which comes handy when you need to use proxy for your web browser only rather than the whole system. It supports 4 different type of proxy
- No Proxy (Direct connection), This is the default settings
- Auto-Detect Proxy Settings: Firefox will detect your proxy settings automatically, if provided by Internet Service Provider (ISP)
- System Proxy: Firefox will catch the proxy defined for your system (Read this how to define system proxy for Google Chrome & Internet Explorer)
- Manual Proxy (Firefox will use the proxy you’ve entered)
- Automatic Proxy Configuration URL (Proxy will be determined by an URL provided by ISP, if so)
NOTE For IITB Junta:
- Login to https://internet.iitb.ac.in to use Option 1 and 2.
- Use http proxy netmon.iitb.ac.in, Port:80 for Option 4 and check “use this proxy server for all Protocols”, then login automatic popup window with LDAP credentials to browse external (non IITB site) using netmon. Don’t forget to put *.iitb.ac.in in no proxy settings.
- Use www.cc.iitb.ac.in/autoproxy.pac with option 5.
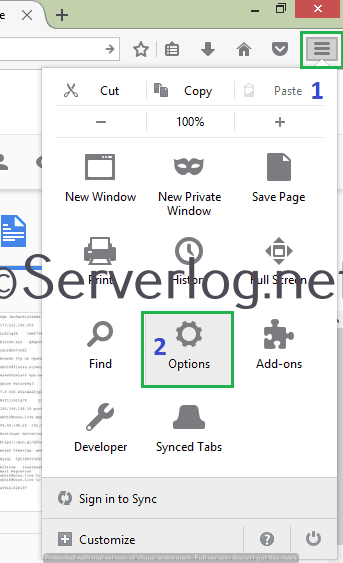
Steps-1: Click Menu at top-rightmost part from Firefox, then click Settings

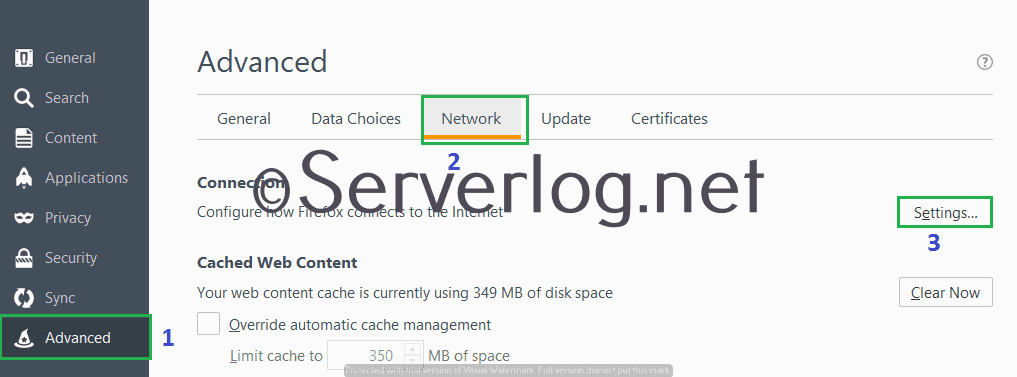
Step 2: Click Advanced –>Network–>Settings

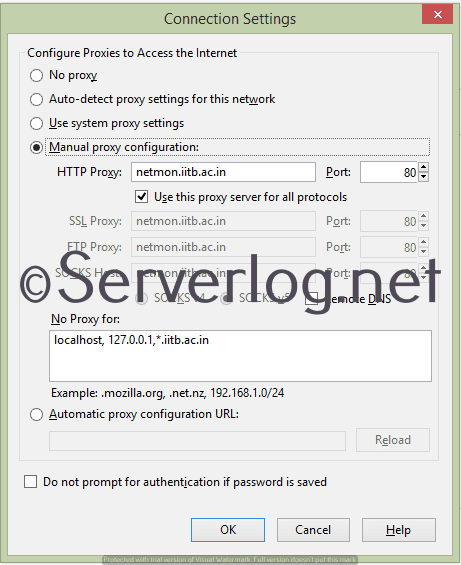
Step 3: Chose the appropriate proxy settings for your ISP or academic institute. For manual proxy put URL and port number as provided. If you want to use same manual proxy for http, SSL, ftp and SOCKS put the proxy in the field of http proxy URL and check the box “Use this proxy for all Protocols” [Read Here for the difference between all those Proxies]
Remember: Don’t forget to configure No Proxy properly. localhost, 127.0.0.1 must be in no proxy and also add your institute/ISP home URL (like *.iitb.ac.in for IITB) in NO proxy settings.
Views: 123


