Change IP address in Windows PC
Although major internet provider configure automatic IP address from DHCP server you may need to configure a static IP address (for using windows RDP, or establishing local games server behind NAT) .This tutorial will show how to change IP address of windows PC from Network and Sharing Center.
Difficulty: Easy,  Time Require: Less than 5 min
- Right Click on the Network Symbol and open Network and sharing center. Select the active network connection and click properties ( read this for more help till this step)
Scroll to bottom and select Internet Protocol Version 4 to change IPv4 address, and click properties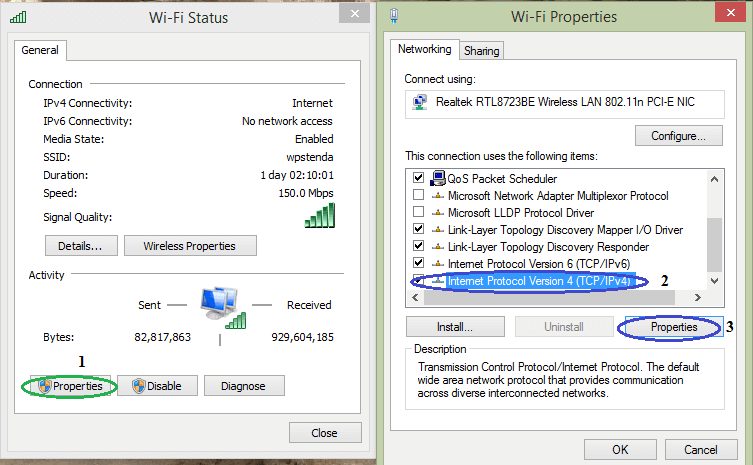
- By default “Obtain an IP address Automatically is selected”. Change it to “Use the following IP address” and put the IP address provided by your Internet provider
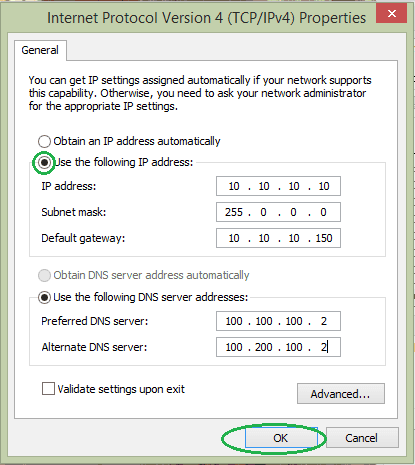
Note: You have to put DNS address manually while using Static IP address. If your DNS server address is automatically obtainable and your provider haven’t supplied one, please go through this to find it, record it first and then put it here.
Views: 253

Very usefull Artical. Its help me a lot.
Thank you..