Connect Remote Computer with Windows Remote Desktop Connection (RDP)
This tutorial describes step by step procedure to login to a remote PC using Windows Remote Desktop Connection (RDC)
Requirements
- Both the PC must have Windows operating system (All releases of Windows from XP to 10 supports RDC)
- The destination PC must have a fixed IP address that is reachable from source PC. (Consider using TeamViewer, if destination doesn’t have a fixed IP address)
- Port 3389 must be open in destination PC
Procedure:
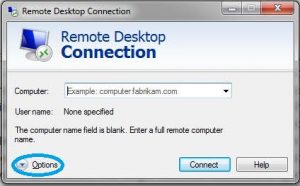
- Search for “Remote Desktop Connection” in start Menu. In Windows 7 it’s in Start–>All Program–>Accessories. Click it
-
Click Options in the screen thus open
-
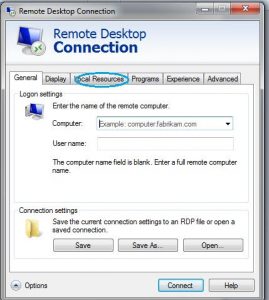
Click Local Resource (This step is to mount your local disks to your remote computer for easy file transfer)
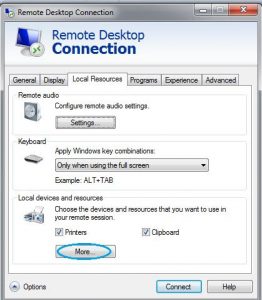
- Click More
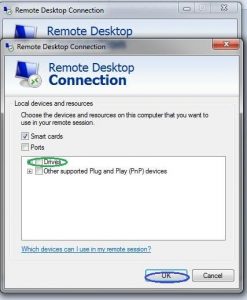
- Check Drivers (In eg. photo it’s green circled, not checked, please click and check it) and hit ok.
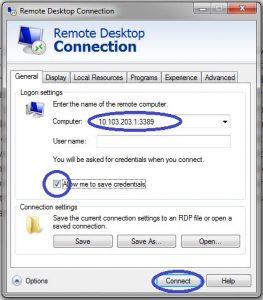
- Go back to the general tab. In computer Put the IP and port “10.103.203.1:3389” and hit connect (Change 10.103.203.1 with IP address of the destination PC)
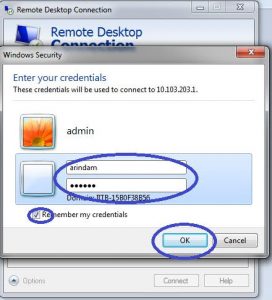
- Press “Yes” “Connect” as asked. Use login credential of the remote computer
 It’s now connected. You can access any file hard disk etc. Your local computer’s drive is also available in remote computer’s “My Computer”. You can copy anything required.
 -
You can simply cross to disconnect or you will find the disconnect button at the same position of “shutdown” option. But if you ever need to actually shut down the remote PC go to command prompt and type “shutdown -s” and hit enter. Remember you can shut down remotely but can’t turn it on. You can restart remotely by typing “shutdown -r” in command prompt, then wait for some time (5min) for the computer to be ready for remote connection again.Â
Views: 56